
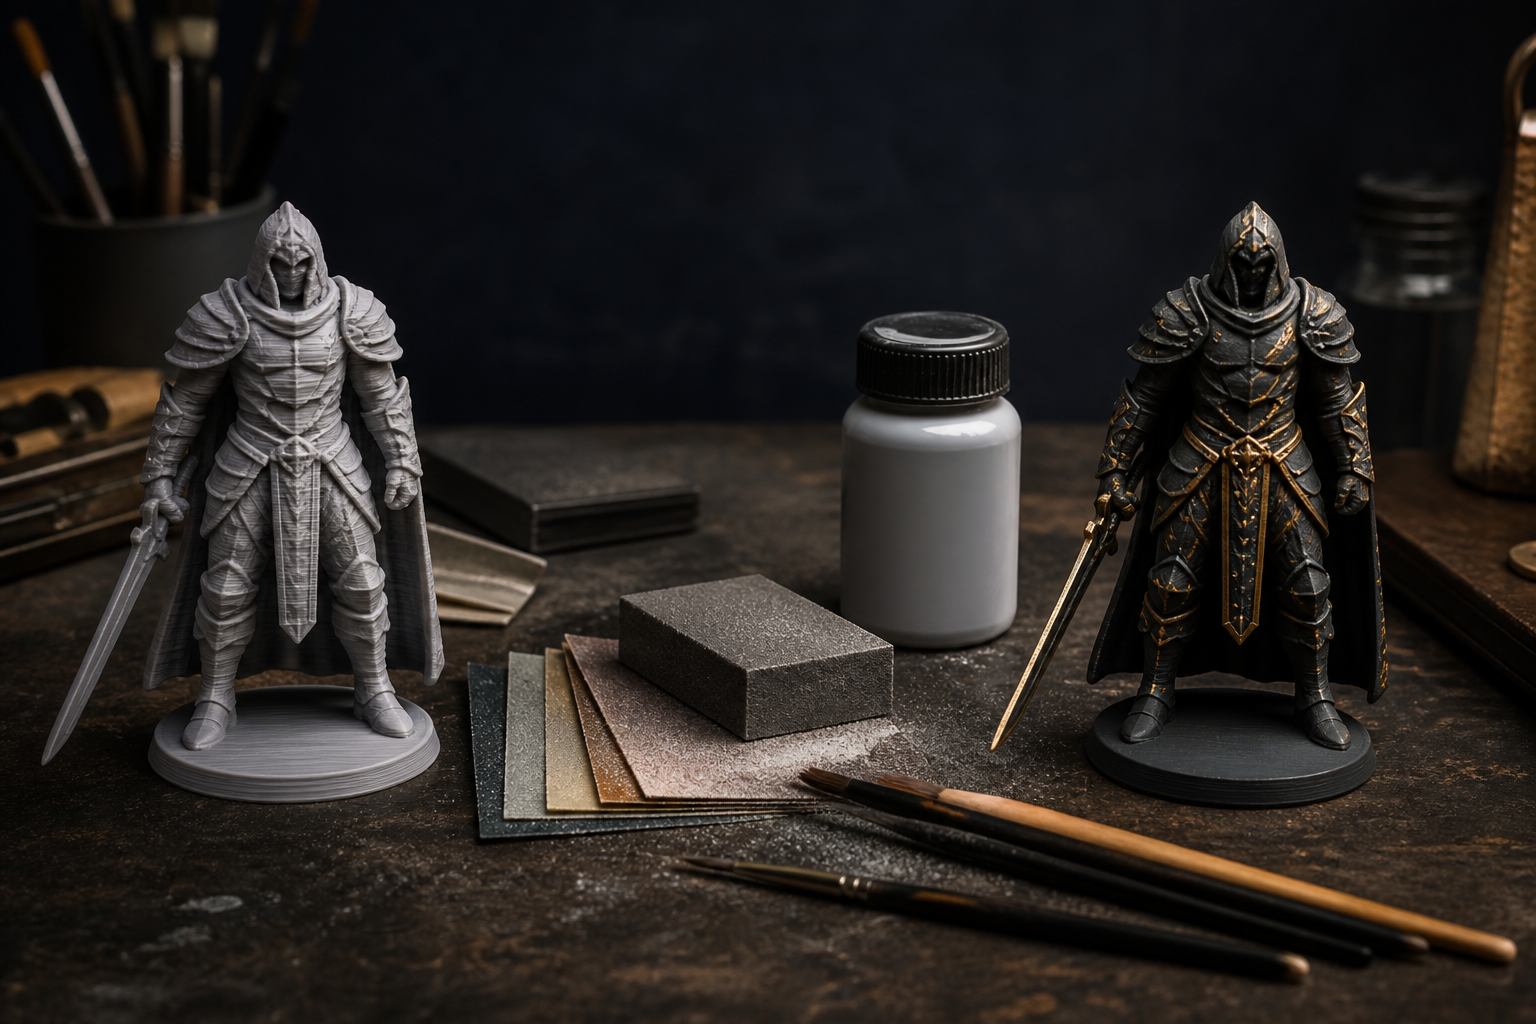
A print coming off the bed is a raw part, not a product. Layer lines, support nubs, elephant’s foot, and a slightly fuzzy first layer are normal FDM artifacts. The difference between “3D printed” and “looks manufactured” is almost always finishing — and finishing is a sequence, not a single trick with sandpaper.
This guide is the order we use in the shop: remove supports, knock down scars, sand through grits, fill if needed, prime, then paint or leave a clean industrial look. It assumes FDM (filament). Resin parts sand faster but need their own wash/cure discipline; do not mix those chemicals with this workflow.
Decide the finish before you slice
Post-processing starts in the slicer. If a face will be seen, put it on the bed or on a steep wall — not on a 30° overhang full of supports. If a face will be painted, you can print slightly faster (0.2 mm) and spend the time on filler primer instead of an 8-hour 0.12 mm job.
- Display / gift: budget time for sanding and paint. Print orientation for the prettiest outer walls.
- Functional bracket: clip supports, deburr holes, maybe a light sand on mating faces. Paint is optional.
- Fit-critical part: sand mating faces last, and measure. Aggressive sanding changes dimensions by 0.1–0.3 mm easily.
Step 1: Remove supports without gouging the part
Let the part cool. Warm plastic tears. Flush cutters, a deburring tool, and a sharp hobby knife beat brute force.
- Twist tree supports off in small branches, not as one lump.
- For snug supports under a flat, slide a thin scraper along the interface — do not pry upward into the skin.
- Leave a tiny stub rather than ripping a crater. Stubs sand off; craters need filler.
PETG welds to supports more than PLA. If you fight every job, increase support Z-distance slightly on the next print rather than carving the surface to death.
Step 2: First cleanup — nubs, brim, and elephant’s foot
Clip the brim flush. If the first layer flared (elephant’s foot), a few strokes of a coarse file or a chamfer tool on the bottom edge will make the part sit flat and look intentional. Drill or ream holes that printed undersize; FDM holes almost always come out tight.
Step 3: Sand in grits, not in anger
Dry-sanding PLA and PETG loads paper quickly. Work through grits. Skipping from 80 to 600 leaves 80-grit scratches that paint will highlight, not hide.
- 120–180 — knock down layer lines and support scars. Stop here for shop jigs.
- 240–320 — the grit that actually prepares for primer. Most of your time should live here.
- 400–600 — after primer, or on faces that will stay unpainted and need a satin plastic look.
Use a sanding block on flat faces so you do not dish the middle. On curves, wrap paper around a dowel or use foam-backed pads. Wet-sanding from 400 up reduces dust and clogging; keep water off electronics and off untreated wood desks.
Health: FDM dust is plastic dust. Sand outdoors or with a mask. Do not blow the part with your mouth over the workbench.
PLA, PETG, ABS — they do not finish the same
- PLA sands well and takes filler primer. It softens if you overheat it with aggressive power sanding. Hand sanding is safer on thin walls. PLA also likes spray primer; it does not chemically smooth with acetone.
- PETG is tougher and gummier. Paper clogs faster. Use sharper fresh paper, lighter pressure, and expect more time. PETG paint adhesion is pickier — degrease and prime.
- ABS / ASA sand cleanly and can be vapor-smoothed with acetone in a controlled setup. That is a chemical process with fumes and fire risk, not a kitchen-table trick. For most product photos, filler primer plus paint is safer and more repeatable than vapor smoothing.
Step 4: Fill remaining layer lines
After 240-grit, remaining valleys are faster to fill than to sand to oblivion.
- Filler primer (high-build spray) is the default. Two light coats, 20–30 minutes apart, then sand 320–400. Repeat once if you still see lines in raking light.
- Spot putty / modeling filler for craters from ripped supports. Press in, cure, sand flush.
- Some makers brush on a thin epoxy or UV resin on display pieces. That is a coating, not a structural upgrade — and it changes dimensions. Use it on sculptures, not on press-fits.
Hold the part under a raking desk lamp. If you still see stripes, they will show through gloss paint. Matte paint hides more sins; gloss hides none.
Step 5: Prime, paint, protect
Degrease with isopropyl alcohol after sanding. Finger oil in Cairo summer will fish-eye a spray coat.
- Shake primer. Light passes, 20–30 cm away. Heavy wet coats drip and eat fine edges.
- Color in thin layers. Two thin color coats beat one thick one.
- A clear topcoat (matte or satin for products, gloss for display) protects PLA from fingerprints and minor UV chalking on a windowsill.
Acrylic hobby paints work on primed PLA. Automotive sprays work if you want durability on a prop or enclosure. Always test on a scrap printed in the same material — PETG in particular can reject some primers.
When not to finish
Do not sand a snap-fit until it has been tested. Do not paint a heat-set insert boss that still needs a soldering iron. Do not chase a mirror finish on a 300 mm PETG duct that lives inside a machine. Finishing is labor. On Souq3D, say in the request whether you need as-printed functional, deburr only, or paint-ready / painted. Those are three different quotes.
A realistic time budget
A 120 mm figurine, as-printed to display paint: 20–40 minutes support cleanup, 45–90 minutes sanding and primer cycles, then paint. A mechanical bracket: 10 minutes with clippers and a file. If a client wants a painted product look on a large enclosure, that finishing can cost more than the print. Price it honestly — or print in a color that already matches and only sand the visible face.
Hand it to a maker when the finish is the product
Cosplay armor, retail mockups, and gift pieces live or die on finishing. If you do not have primer, space, or patience, send the STL with a photo of the finish you want (matte black, “like injection molded,” gold leaf, raw technical). Egyptian makers on Souq3D already run this pipeline daily. You get a part that looks like a product, not a stack of layers — and you skip a weekend of white dust on the balcony.


Comments (0)
No comments yet. Be the first to share your thoughts.